
From Previous Blog, we have learnt how to setup your machine for Selenium Script. Now we will work on Eclipse for writing our First Selenium Script
Steps :
- Open Eclipse
- Go to File Menu—> New—> Java Project

3. Enter Project Name as “First_selenium_project” and select Finish Option to save project

4. After Project is saved, we first need to create Class. To create class go to Project Folder
“First_selenium_project”—>src—>right click—>create class

5. Once class is created, Eclipse will look like this

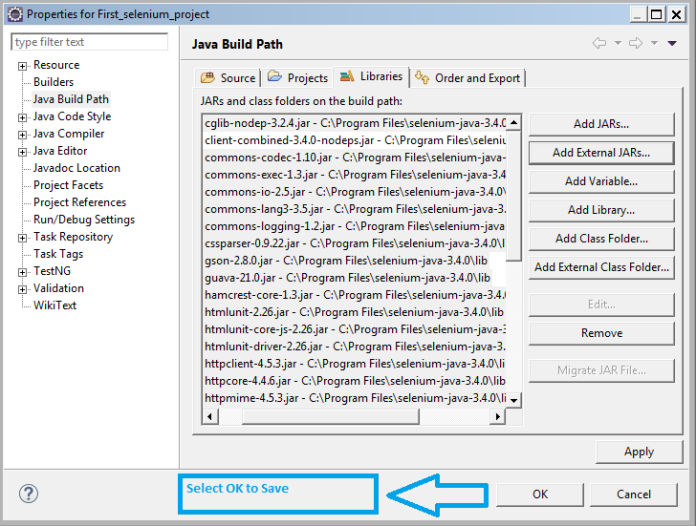
6. After this,we need to import JAR Files to our Project. For this, go to
Project—>Select Properties Option—>Select Java Build Path—>Libraries Tab—>Click Add External JARs

7. After clicking on “Add External JARs” select Selenium Java Client Driver and add all JAR Files indise and outside “libs” folder. Click OK to save the changes
8.Now you are ready to write your first Code
Copy paste the below Code and save it and execute it by selecting “Run” option
import org.openqa.selenium.WebDriver;
import org.openqa.selenium.firefox.FirefoxDriver;
public class Main_class
{
public static void main(String[] args)
{
WebDriver driver = new FirefoxDriver();
driver.get(“http://google.com”);
System.out.println(driver.getTitle());
driver.close();
}
}
Happy Coding Guys 🙂
